Push-notifications
How does this format work?
A user subscribes to receive Push Notification from a Publisher's website. Once a user is subscribed, they will receive a push notification ad that consists of an icon, creative, title, and a short description. By tapping on a notification, a user is redirected to your advertising campaign’s landing page/target URL. By the way, it is easy to control your subscription: a user can unsubscribe at any moment via their browser settings.
How to create a Push notification campaign?
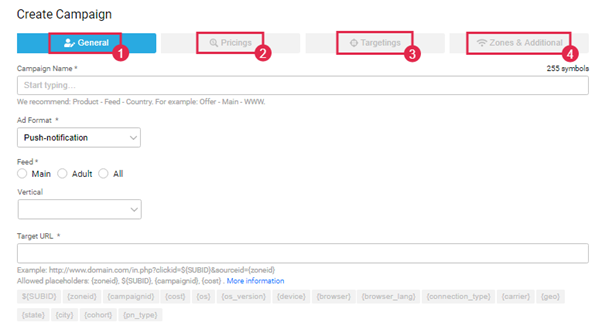
All advertising campaigns are created on the ‘Create campaign’ page. The button is located at the top of the page:
Then, you can choose Push notification and an appropriate pricing model (depends on what you want to pay for - impressions, clicks, or conversions):
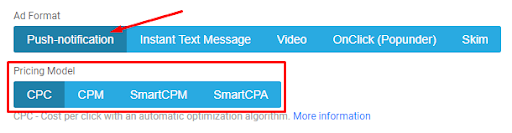
You can find more information about different pricing models available on our platform in the ‘Pricing models’ section of our F.A.Q. for Advertisers.
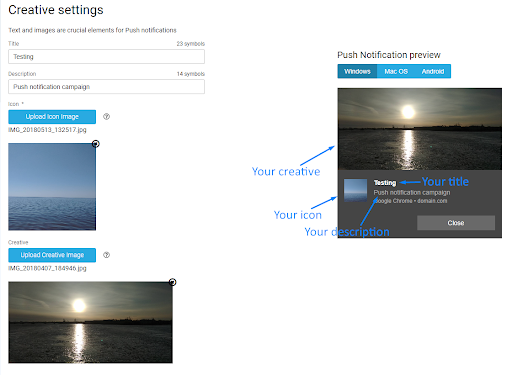
The main feature of Push notifications is its Creative settings. Here you can type in a title and a description of your future push notification that a user will see as well as upload a small icon and creative images. After you are done with setting up your push creative, you will see an example of how your prospective push notification will look on different devices (‘Push Notification preview’ on the right side of the page).
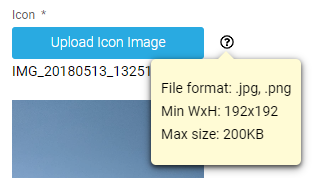
What is more, you can always access creative requirements (such as allowed image formats and size). You only need to click on an icon  next to the ‘Upload’ button:
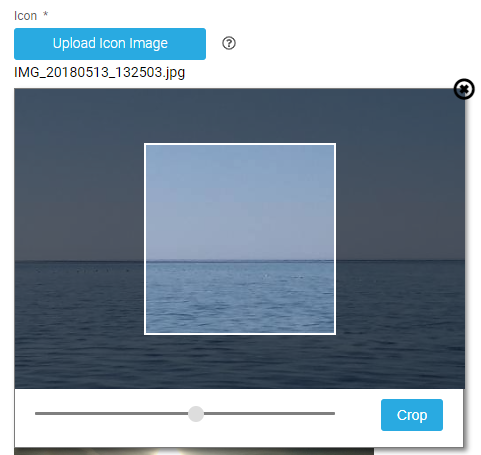
While uploading an icon/creative, you can crop the original image so that only a certain part of it is shown in a push notification:
The next important step of creating a Push notification campaign is setting the ‘User Activity’ level:
In this section, you can set user activity levels for the push traffic sent to your campaign. We recommend creating 4 separate campaigns for each user activity level to see what works best on your offer: one for ‘High’, the second one for ‘Medium’, the third one for ‘Low', and the fourth one for 'Remnant’. This will help you test out how effective your campaign/offer campaign will be in different settings and, thus, it will help further optimize your campaigns.
Last (but not least) part of a push notification campaign creation process is ‘CPC Test settings’ (in case you have decided to run your push campaigns on CPC or SmartCPA pricing model):
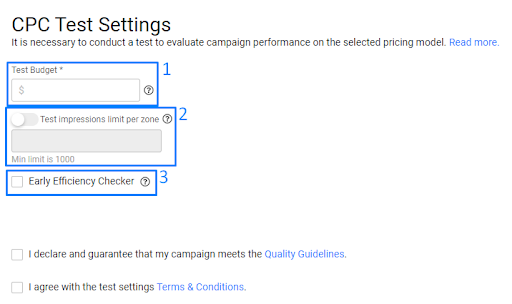
A test is necessary for CPC and SmartCPA campaigns. It helps to determine the effectiveness of your campaign and its performance in the future.
Here you need to set:
- Test budget (the budget used to cover test expenses);
- You can use the ‘Test impressions limit per zone’ feature and set how many impressions you would like to receive from a certain traffic source/zone before a single click/conversion appears on it(using this option helps to exclude zones that do not bring any clicks/conversions automatically during the testing period);
- You can turn the ‘Early Efficiency Checker’ feature on: it is designed to help you determine the effectiveness of your campaign in its early stages.
You can find more information about test settings by clicking on ‘Read more' in ‘CPC/SmartCPA Test Settings’ or by checking the articles about CPC and SmartCPA pricing models in our F.A.Q. for Advertisers.
At the end of the campaign creation process, do not forget to agree with our Guidelines and Terms & Conditions:
